![PrintReleaf-2023-Horizontal-RGB.svg]](https://help.printreleaf.com/hubfs/PrintReleaf-2023-Horizontal-RGB.svg)
Before you begin..
This process works best for Commercial Printers entering print volume for fewer than ~10 clients.
Uploading volume for more than 10 clients? We suggest you follow steps in our article: How to Upload Multiple Customers' Print Jobs at Once via Spreadsheet or email support@printreleaf.com for guidance.
-
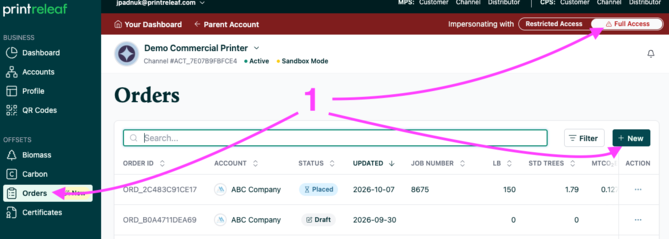
Ensure you're viewing as a Full Acccess user, click Orders and then +New.
-
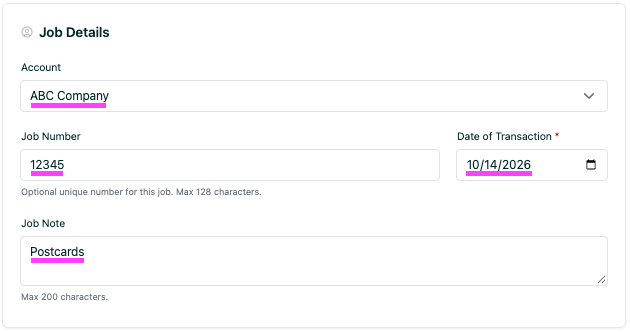
Complete the job details. Select the Account you’re adding the print job to, then enter the Job Number, the Date of Transaction (required), and an optional Job Note.
-
Add paper data. Scroll down and click Add Item + to add an item, then click it again for each additional item in the order. You can enter paper data by paper specs or by bulk weight.
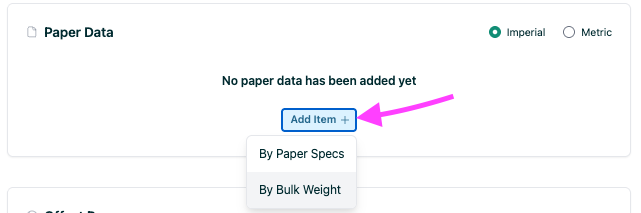
Note: Can’t find the paper type you need when adding by Paper Specs? Add it by selecting Paper under the Admin section of the left menu. To add several paper types at once, contact support@printreleaf.com and we’ll help.
-
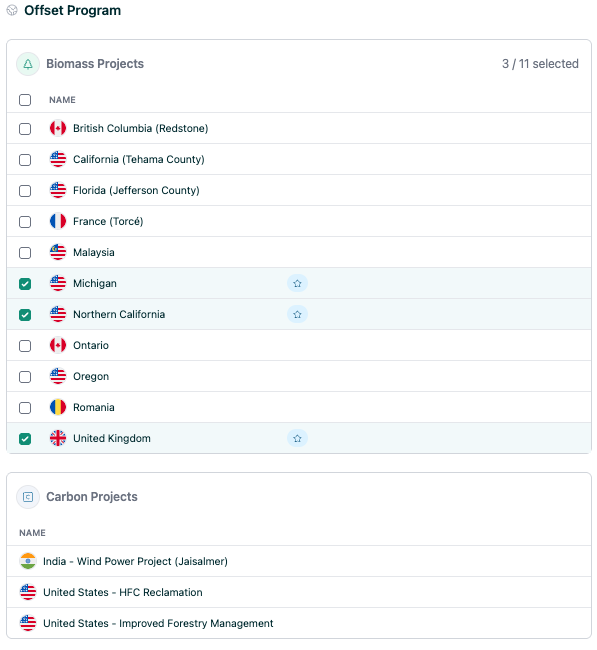
Confirm the Offset Program. Favorited Biomass Projects will be auto-selected and indicated with a star. You can add or remove projects on each order. Carbon Projects are fixed based on the individual customer's plan.
-
Review the Order Summary.
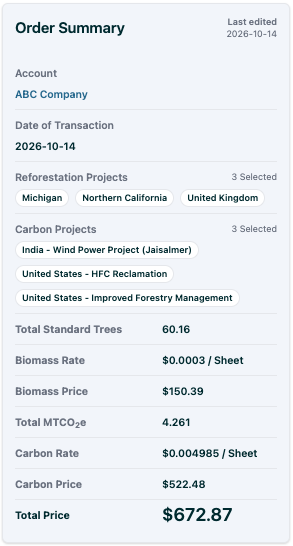
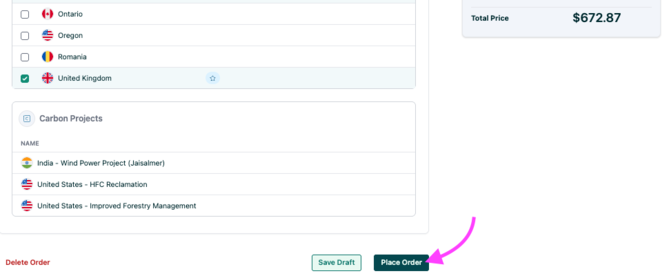
- Click Place Order to enter your customer's print job.
- Your Order has been placed.
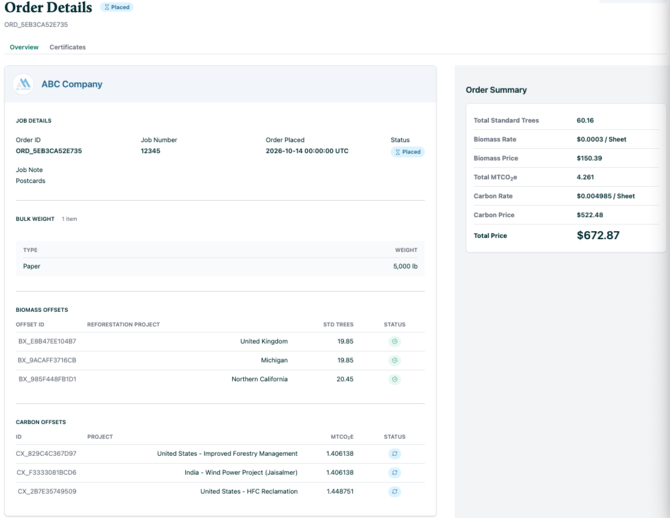
Note: Your customer’s print job is submitted right away and typically fulfilled within 24 hours. Once fulfilled, its status updates, and the offsets are certified and added to the customer’s official Lifetime Certificate total.