![PrintReleaf-2023-Horizontal-RGB.svg]](https://help.printreleaf.com/hubfs/PrintReleaf-2023-Horizontal-RGB.svg)
Before you begin...
To use the PrintReleaf/CEO Juice integration, you first need to subscribe to ID136. This gives PrintReleaf access to the Juice API for eAutomate in order to synchronize paper consumption data into PrintReleaf. Once subscribed to ID136, CEO Juice will provide you with the credentials below necessary to register your CEO Juice server in PrintReleaf.
Credentials Required
You will need the following credentials to register your CEO Juice server in PrintReleaf:
-
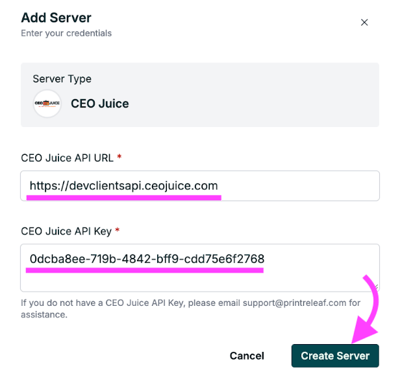
API URL: The URL of your CEO Juice API server.
-
API Key: An authentication token used by PrintReleaf to access your CEO Juice server.
Part I: Create a CEO Juice server in PrintReleaf
-
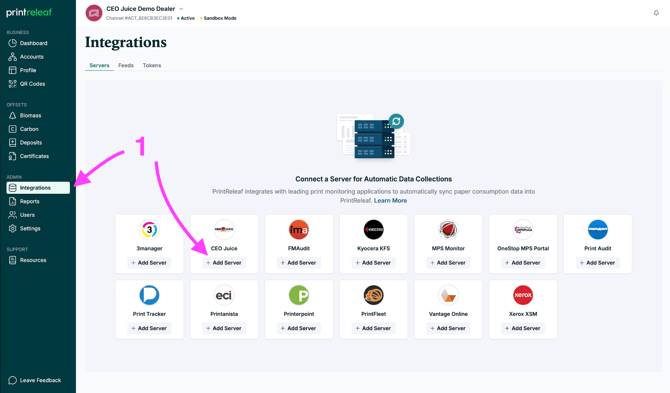
Click Integrations in the main menu. Locate the CEO Juice tile and click +Add Server.
-
Enter your CEO Juice API URL and API Key. Click Create Server.
-
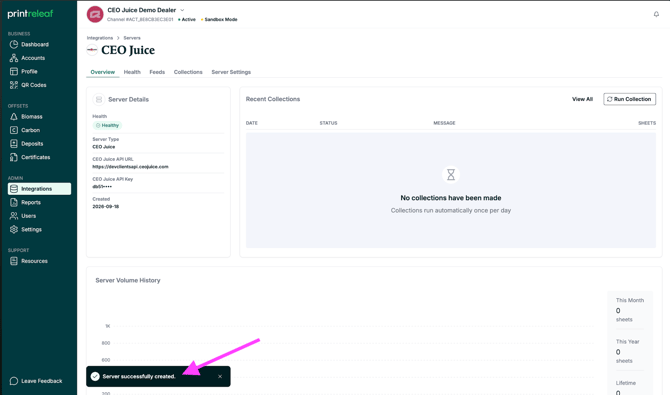
Your CEO Juice Server has been successfully created.
If you want to add several customers at once, please email us at support@printreleaf.com to let us know your server is set up. We will prepare a list of your CEO Juice customers and send it to you in a spreadsheet. From there, you'll identify which customers you'd like to add to PrintReleaf, send that list back to us, and we'll create the accounts and complete the integrations on your behalf.
If you've already completed your initial setup and are looking to add customers one at a time, continue to Parts II & III below.
Part II: Create a customer Account
-
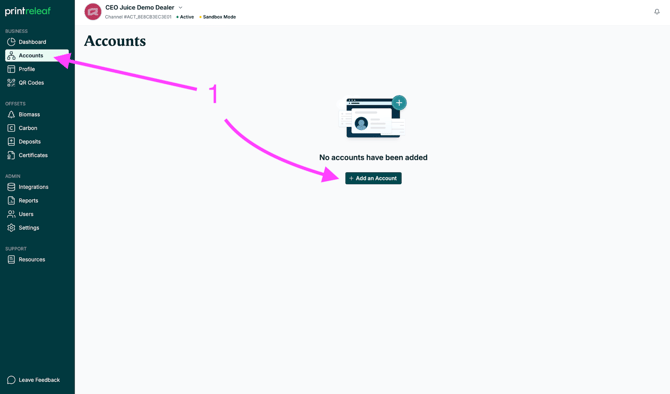
Navigate to Accounts from the main menu, then click +1Add an Account.
-
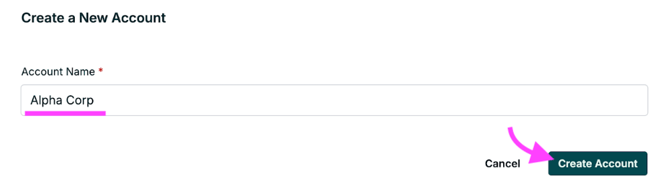
Provide a Name for the Customer Account, then click Create Account.
-
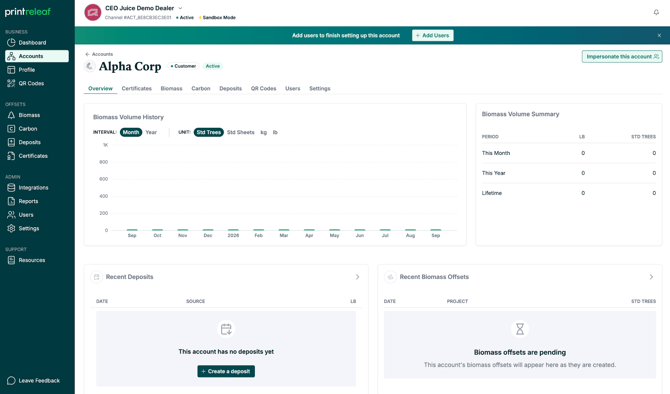
Your Customer Account has been successfully created
Part III: Create a CEO Juice Customer feed
-
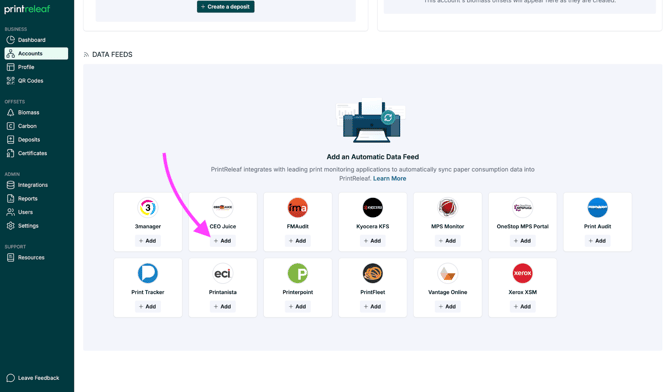
Scroll down the new Account overview screen (viewing at Channel level) to the Data Feeds section, locate the CEO Juice tile, and click Add.
-
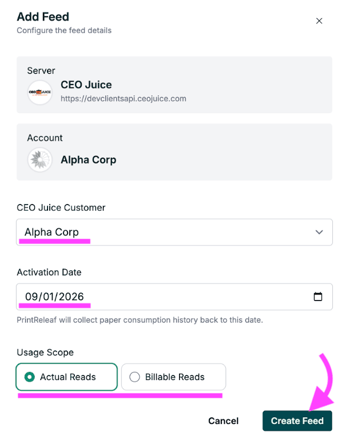
Select the CEO Juice Customer from the dropdown menu. Set the Activation Date. Set the Usage Scope. To complete, click the Create Feed button.
-
Your Customer Feed has been successfully created
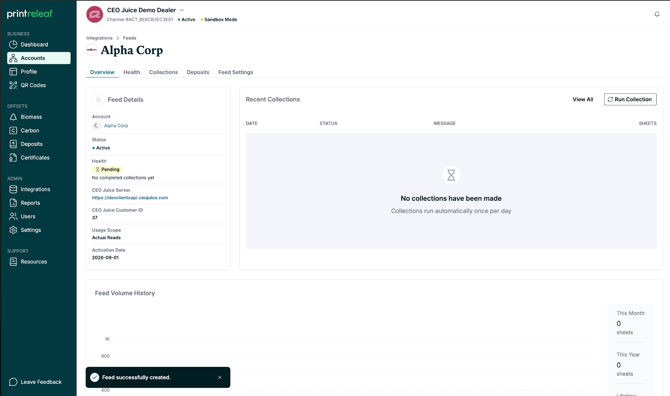
What happens next? Allow ~24–48 hours for "actual reads" print data to begin populating in your feed. "billable reads" will populate shortly after customer invoices are issued.
If you run into any issues or have questions, please contact support@printreleaf.com for help.