![PrintReleaf-2023-Horizontal-RGB.svg]](https://help.printreleaf.com/hubfs/PrintReleaf-2023-Horizontal-RGB.svg)
Requirements
To use the PrintReleaf/Print Tracker integration, you must request a specific API endpoint to be configured against your Print Tracker database for the PrintReleaf integration. This gives PrintReleaf limited, read-only access to your data. You can make this request in the Print Tracker support portal. Print Tracker will provide you with the credentials below necessary to register your Print Tracker server in PrintReleaf.
Credentials Required
-
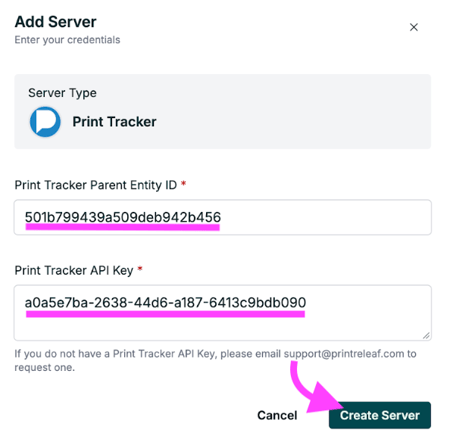
Print Tracker Parent Entity ID: This is your Print Tracker Dealer Entity ID. It is a 24-character hexadecimal string, e.g.
ae6456e192cf03114696de54 -
Print Tracker API Key: This is your Print Tracker API key. It is a 36-character hexadecimal string in the form of a UUID, e.g.
a97153a6-f975-4826-a63e-03fe618b4531
Part I: Create a Print Tracker server
-
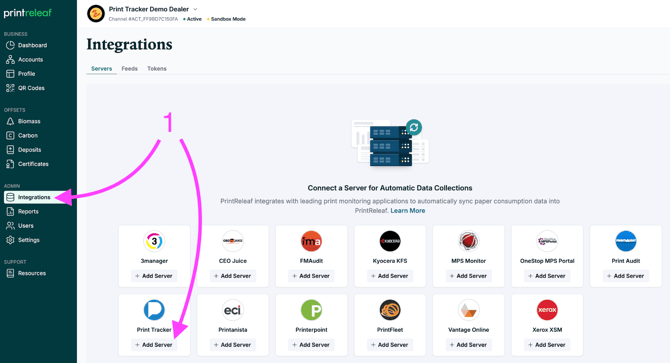
Navigate to Integrations from the main menu. Locate the Print Tracker tile, click +Add Server.
-
Enter your Print Tracker Parent Entity ID, API Key, and click Create Server.
-
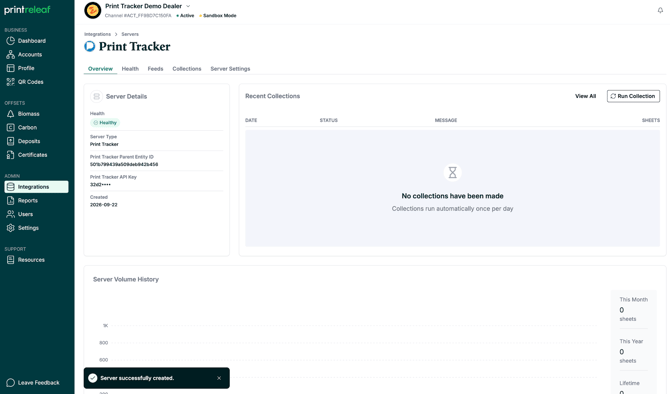
Server has been successfully created.
If you want to add several customers at once, please email us at support@printreleaf.com to let us know your server is set up. We will prepare a list of your Print Tracker customers and send it to you in a spreadsheet. From there, you'll identify which customers you'd like to add to PrintReleaf, send that list back to us, and we'll create the accounts and complete the integrations on your behalf.
If you've already completed your initial setup and are looking to add customers one at a time, continue to Parts II & III below.
Part II: Create Customer Account in PrintReleaf
-
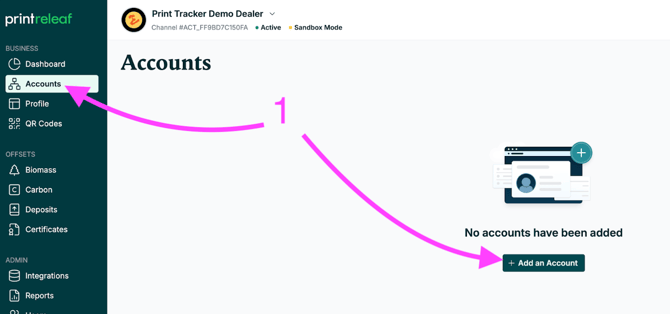
Navigate to Accounts from the main menu and click +Add an Account.
-
Provide a Name for the account.
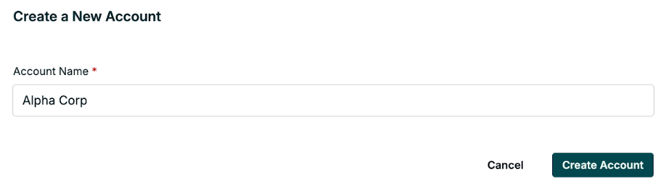
-
Account has been successfully created.
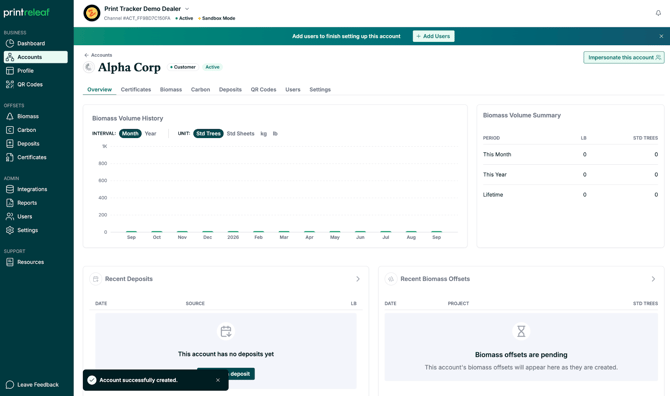
Part III: Create a Print Tracker feed
-
On the Account overview screen, scroll down to the Data Feeds section. In the Print Tracker tile, click +Add.
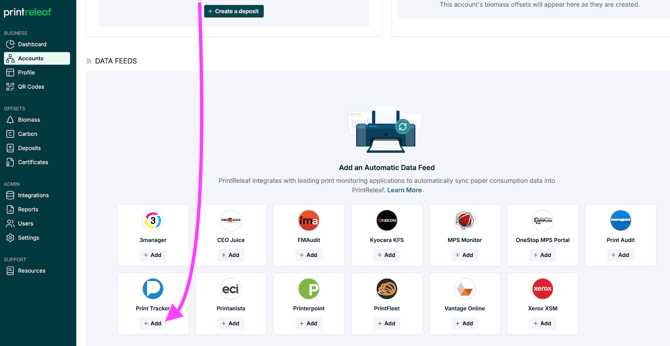
-
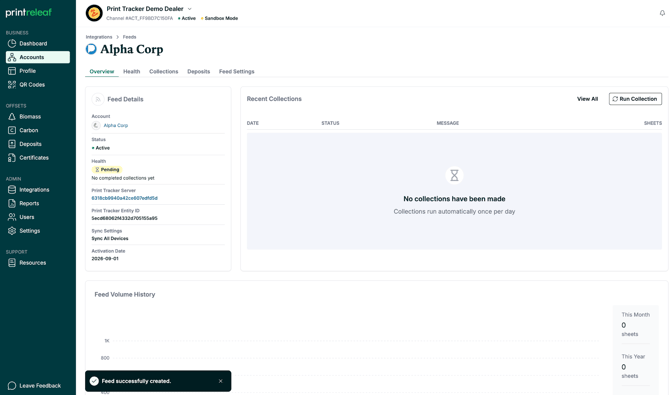
Input the Print Tracker Entity, Activation Date, select Sync Settings, and click Create Feed.
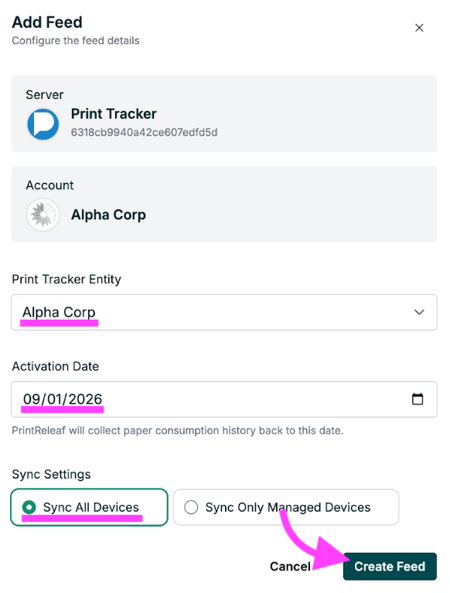
- Feed has been successfully created.
What happens next? All Print Tracker data syncs over within 24-48 hours of establishing the integration feeds.
Volume updates occur every 24hrs.
If you run into any issues or have questions, please contact support@printreleaf.com for help.
Troubleshooting
Seeing a status code? Find it in our Print Tracker Integration Status Codes for the cause and recommended fix.