![PrintReleaf-2023-Horizontal-RGB.svg]](https://help.printreleaf.com/hubfs/PrintReleaf-2023-Horizontal-RGB.svg)
Requirements
Before PrintReleaf can set up an XSM integration, Xerox must email the following to support@printreleaf.com:
- A Purchase Order for your Customer Account's billing setup
- A completed Xerox Account Setup Form (download template)
Completing the Account Setup Form
When filling out the Xerox Account Setup Form, select Variable Monthly Volume in the portal setup section. Then, in the XSM Integration setup section, provide the following:
- XSM Account ID: Your unique XSM account identifier (for example,
afc56d83-9522-4753-9143-08db75212bf6). - Account Name: The name of the XSM account being connected.
- Operations Center: The operations center where your XSM account is hosted. The integration is currently available in CMPSOC, EUOC, NAOC, and GOC.
- Chargeback Code (preferred but optional): The name of a specific chargeback code, if you want PrintReleaf to sync only certain devices. If left blank, PrintReleaf will sync all devices in the XSM account.
Next Steps: PrintReleaf Onboarding for Xerox
PrintReleaf Support will then coordinate with Xerox's Global Integrations team to complete Parts I through III below on your behalf. This typically takes about 5 business days. Once complete, your PrintReleaf Customer Success Manager will reach out to schedule a platform walkthrough and help onboard your client as needed.
Part I: Create an XSM server
-
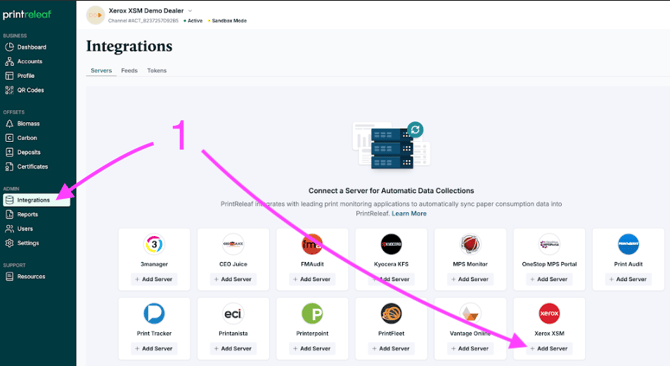
Navigate to Integrations from the main menu. Locate the XSM tile, click +Add Server.
-
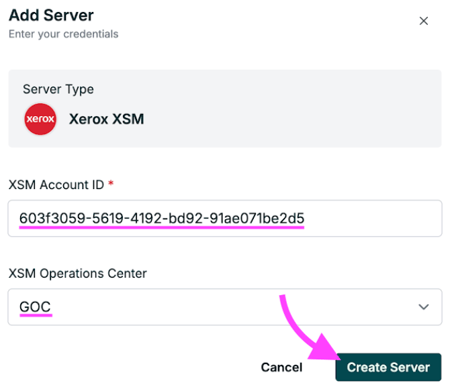
Enter your XSM Account ID, Operations Center, and click Create Server.
-
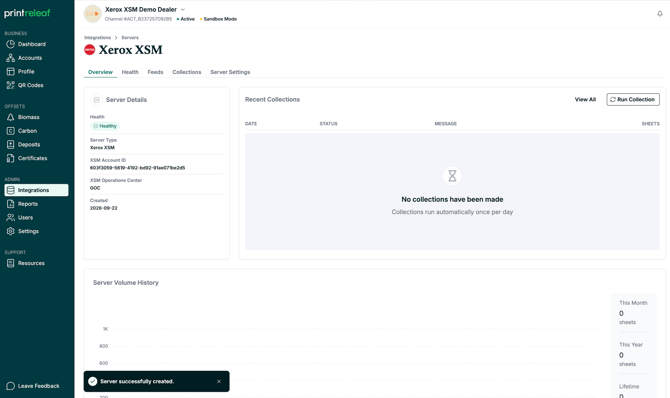
Server has been successfully created.
Part II: Create Customer Account in PrintReleaf
-
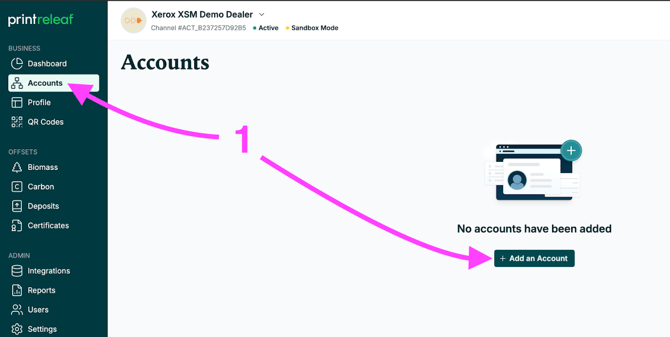
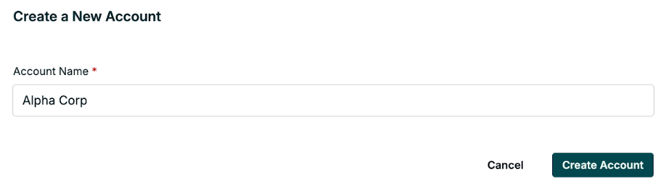
Navigate to Accounts from the main menu and click +Add an Account.
-
Provide a Name for the account.
-
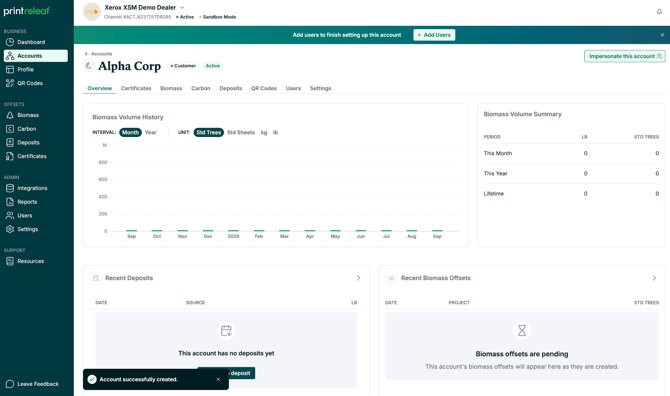
Account has been successfully created.
Part III: Create an XSM feed
-
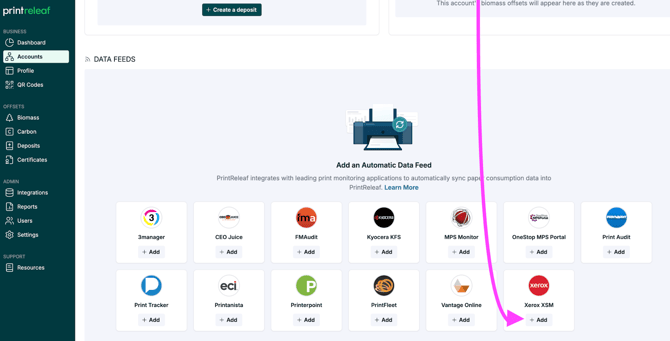
On the Account overview screen, scroll down to the Data Feeds section. In the Xerox XSM tile, click +Add.
-
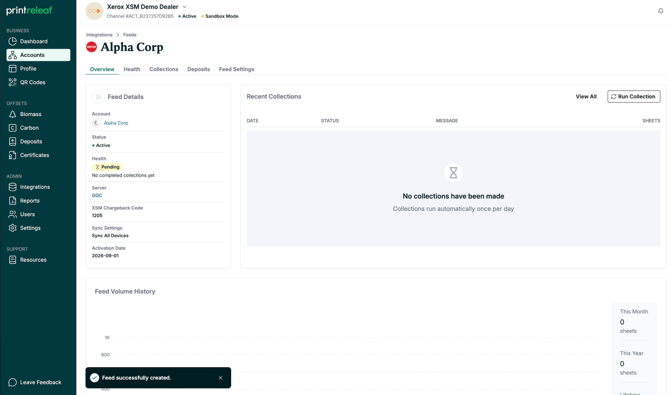
Input the XSM Customer Code, select Sync Settings, and click Create Feed.
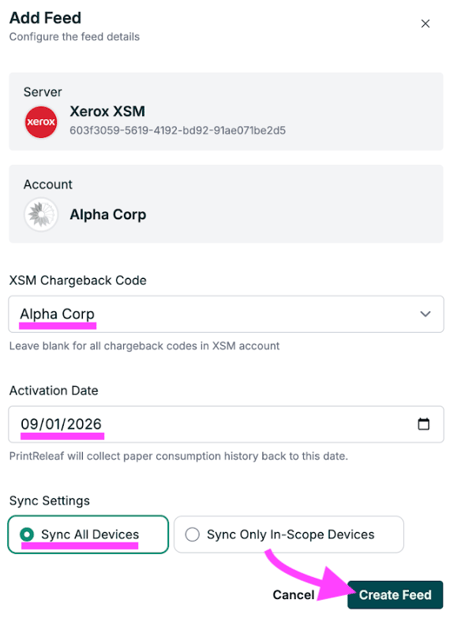
- Feed has been successfully created.
What happens next? All XSM data syncs over within 24-48 hours of establishing the integration feeds.
Volume updates occur every 24hrs.
If you run into any issues or have questions, please contact support@printreleaf.com for help.
Troubleshooting
Seeing a status code? Find it in our XSM Integration Status Codes for the cause and recommended fix.