Part I: Adding your Print Audit Server to PrintReleaf
This will register your Print Audit server in PrintReleaf
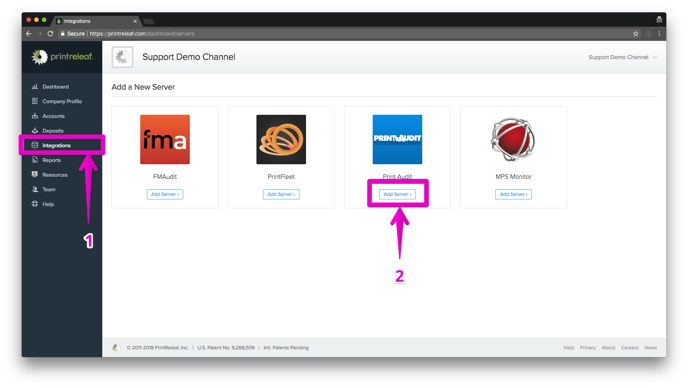
1. Navigate to Integrations
2. Click Add Print Audit Server
3. Enter the URL and Contact Email for your Print Audit server
4. Click Continue to save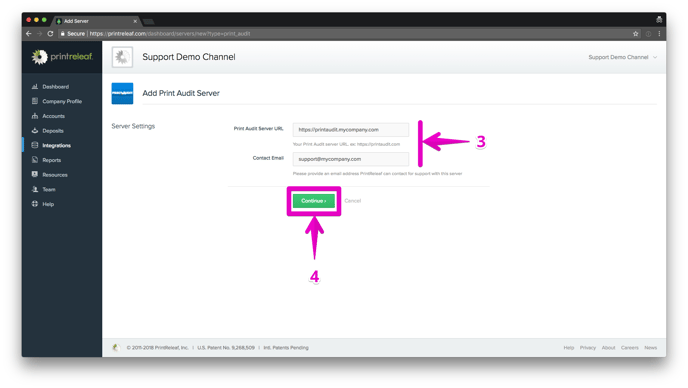
5. Take note of the Web Service credentials in the Print Audit Data Sync Settings section. These will be used later in the guide.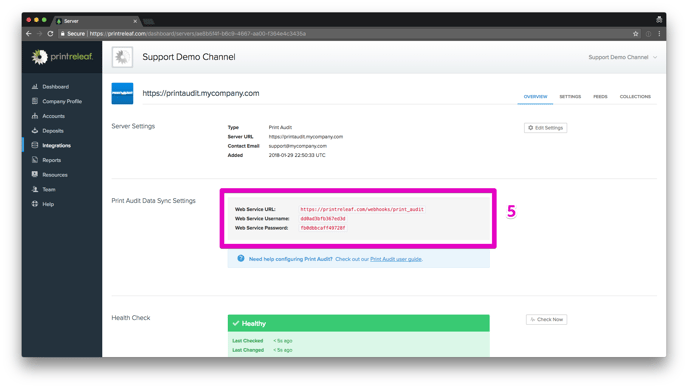
Part II: Configuring your Print Audit server to sync data to PrintReleaf
This will configure a daily report to be sent from your Print Audit server to PrintReleaf
1. Log in to your Print Audit dealer portal with Administrative Rights
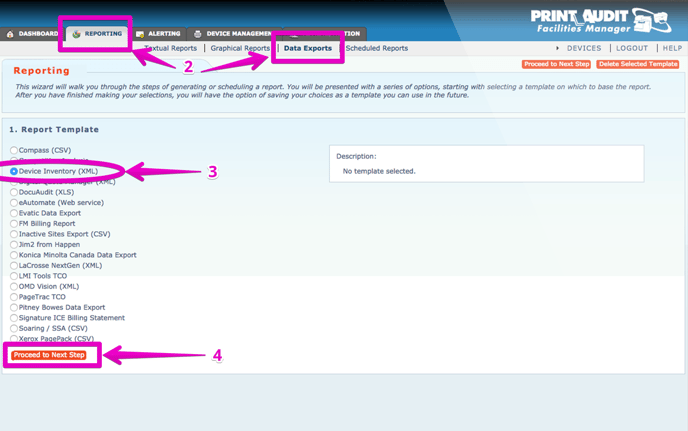
2. Navigate to Reporting > Data Exports
3. Select Device Inventory (XML)
4. Click Proceed to Next Step
5. Select Report by Dealer
6. Select Customer: [All]
7. Select Managed/unmanaged: Managed only
8. Select Report Date: Current
9. Click Proceed to Next Step
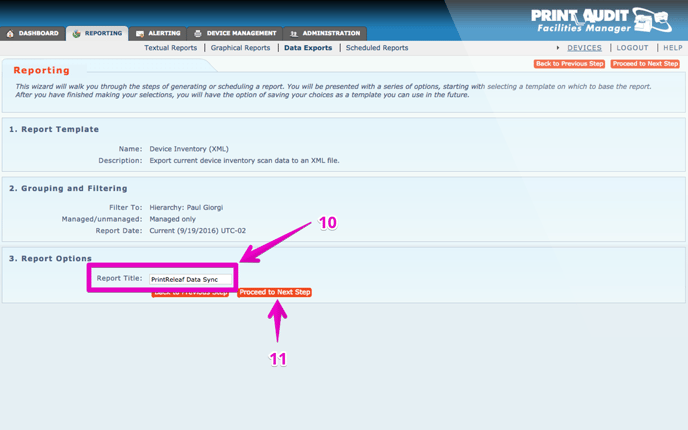
10. Enter PrintReleaf Data Sync for the Report Title field
11. Click Proceed to Next Step
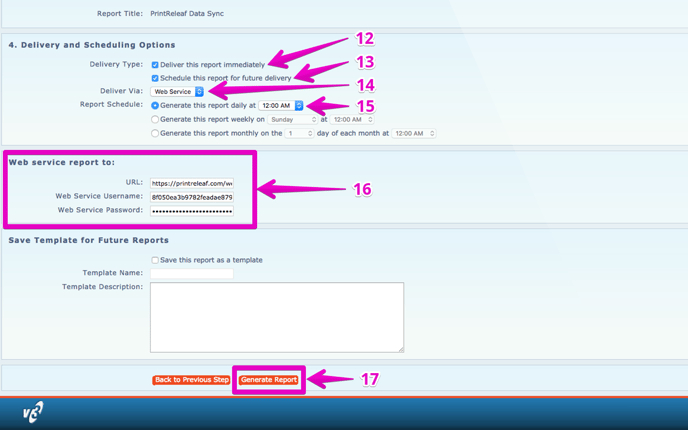
12. Select Deliver this report immediately
13. Select Schedule this report for future delivery
14. Select Deliver Via: Web Service
15. Select Generate this report daily at 12:00 AM
16. Configure the URL, Web Service Username, and Web Service Password fields using the Web Service Settings from Part 1: Step 5 of this guide
17. Click Generate Report
Part III: Connecting a Customer in PrintReleaf to Print Audit
This will configure a new account in PrintReleaf to receive data from Print Audit
1. Log in to your Print Audit dealer portal with Administrative Rights
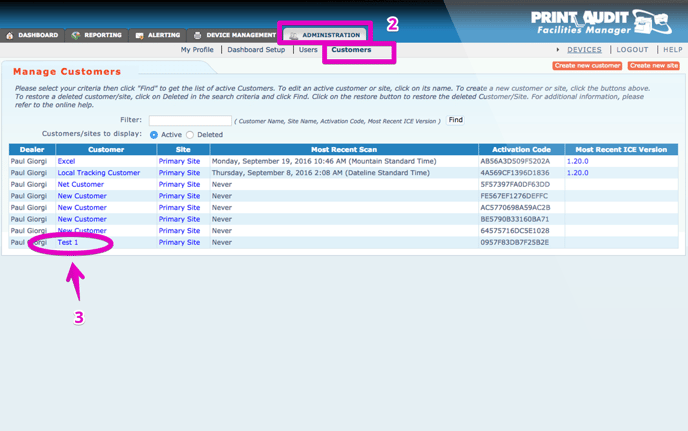
2. Navigate to Administration > Customers
3. Locate and Open the account you wish to connect to PrintReleaf
4. Record the ID from the URL line at the top as you will need the ID # to complete the configuration for this account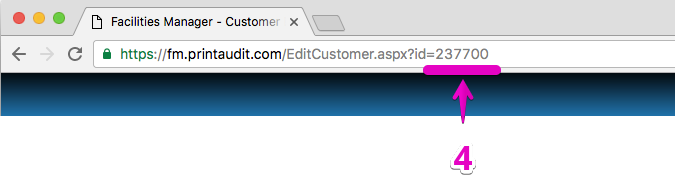
5. Log into your PrintReleaf portal
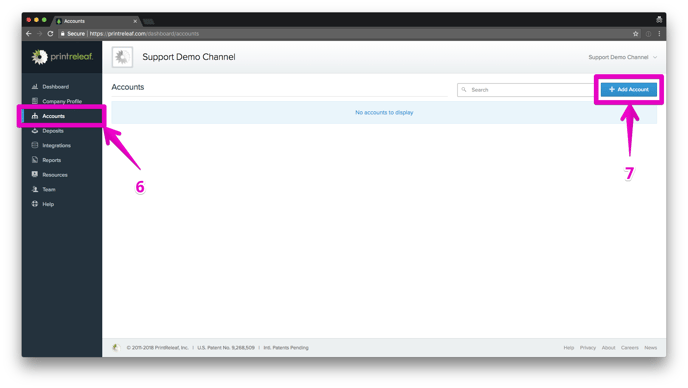
6. Navigate to Accounts
7. Click + Add Account
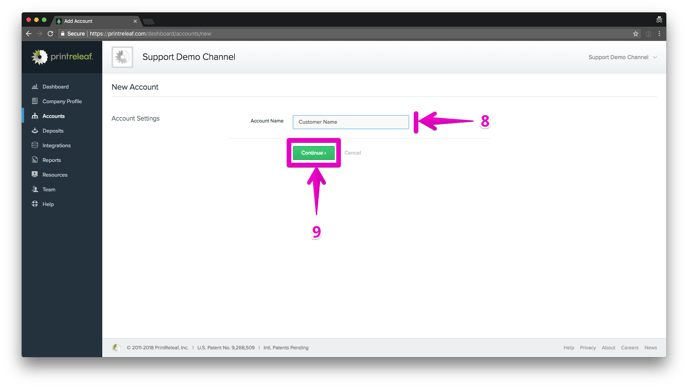
9. Click Continue to save
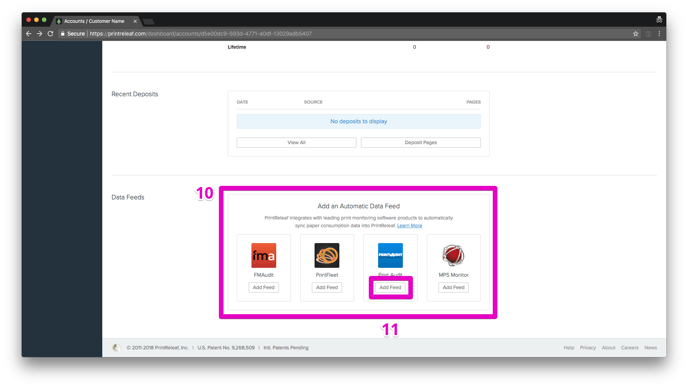
11. Click Add Print Audit Feed
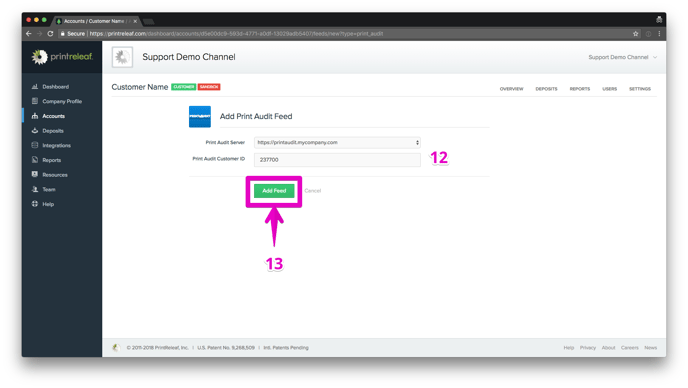
13. Click Add Feed to save
If challenges arise, the PrintReleaf Support team is readily available to assist