![PrintReleaf-2023-Horizontal-RGB.svg]](https://help.printreleaf.com/hubfs/PrintReleaf-2023-Horizontal-RGB.svg)
Before you begin..
This process works best for Managed Print Providers entering print volume for fewer than ~10 clients.
Uploading volume for more than 10 clients? We suggest you follow steps to Upload Deposits via a spreadsheet or email support@printreleaf.com to learn more about our available data integrations.
-
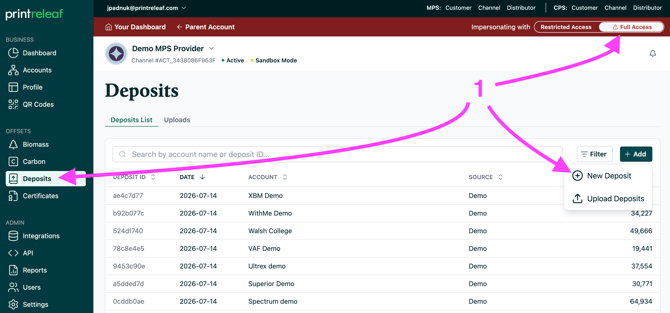
Ensure you're viewing as a Full Acccess user, click Deposits and then +New Deposit
-
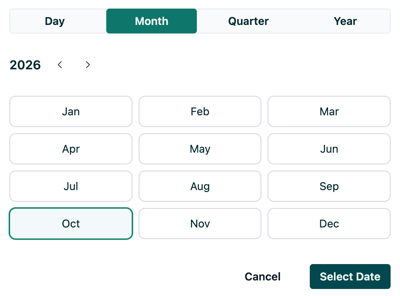
Choose the period that represents when this deposit occured, click Select Date
-
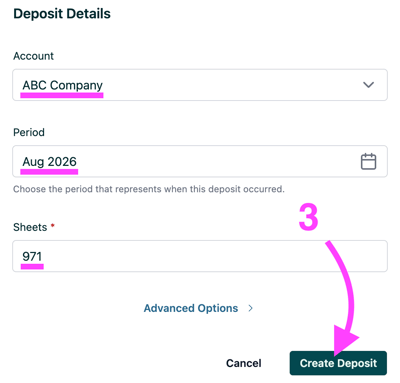
Select the Account from the dropdown, confirm the Period, and enter the number of Sheets (or use Advanced Options for more detail). Then click Create Deposit.
-
Your customer's deposit has been successfully created.
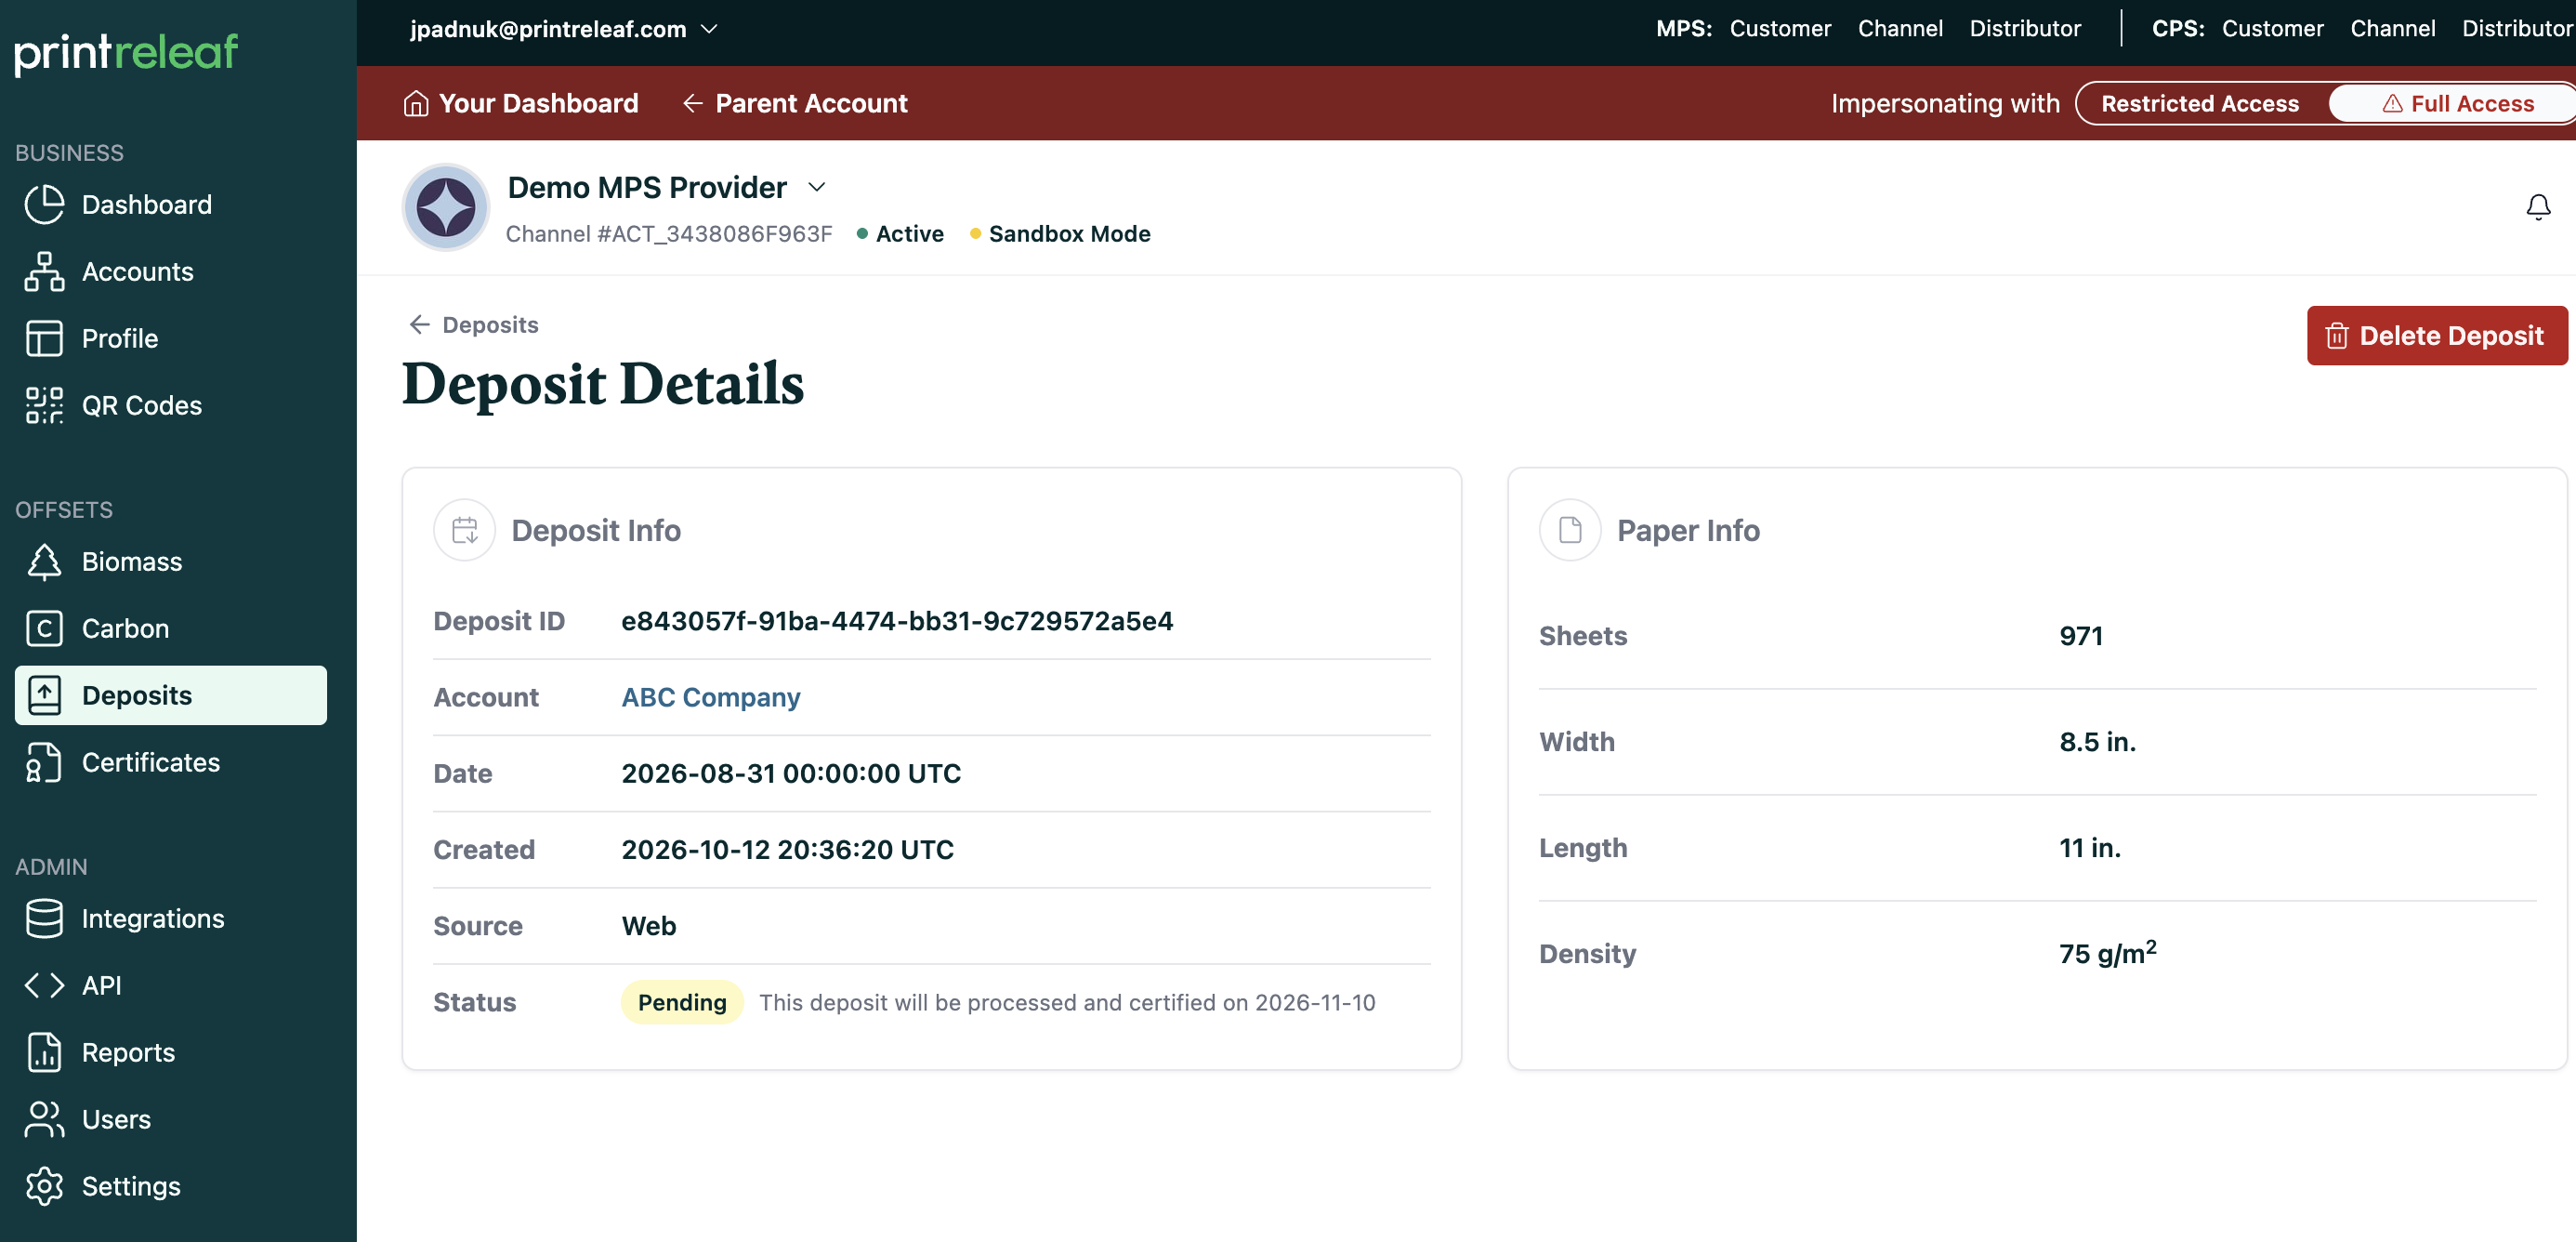
Note: Your deposit will show as Pending until billing is processed, typically on the 10th of the following month. Once processed, it moves to Certified and is added to the customer’s official lifetime offset certificate.